
Looking to set up automated iOS push notifications with Firebase Cloud Messaging? If yes, then read this blog to know the steps.
Introduction
One of the most frequently requested features when developing a mobile app for your business is the ability to enable iOS Push Notifications. Push notifications are, obviously, a very useful tool for any business, so you must set up these notifications.
In this blog, we’ll look at how to set up iOS push notifications with Firebase Cloud Messaging. So, let’s start!
But before that, let us discuss what exactly push notifications are.
What Are Push Notifications?
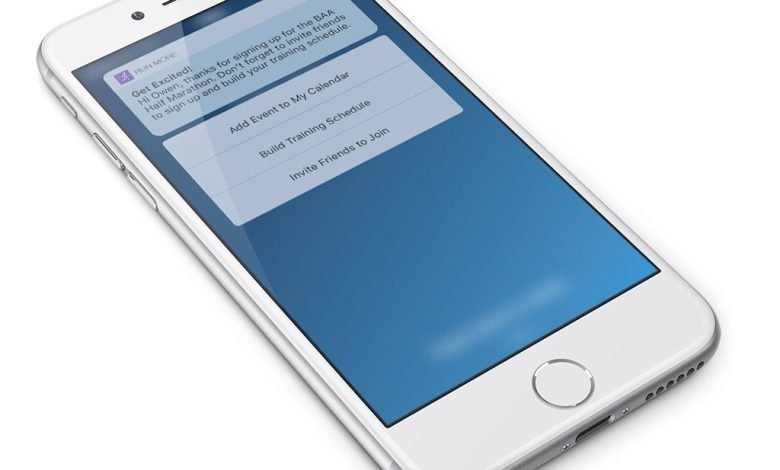
Push notifications are the alert messages that pop up on Android and iPhones. These pop-up messages try to convince your users to take action. And, these notifications allow you to interact directly with your users at the appropriate time and place.
If you have users who have installed your app but have not used it in a while, push notifications are the best way to reconnect with them.
How to Setup Automated iOS Push Notifications with Firebase Cloud Messaging?
You need to set up a few things before you begin.
XCode 9.2 or later
Regarding Cloud Messaging
- A physical iOS device.
- An Apple developer account Apple Push Notification Authentication Key.
- Enable Push Notifications in Xcode’s App capabilities.
Steps to add firebase to your app.
Step 1: Navigate to the Firebase console.
Step 2: Hit on Add project. Then, select a Project name.
- Choose the project from the project name drop-down menu if your app is already linked to a Google project.
- Enter a new project name if you do not already have a Google project.
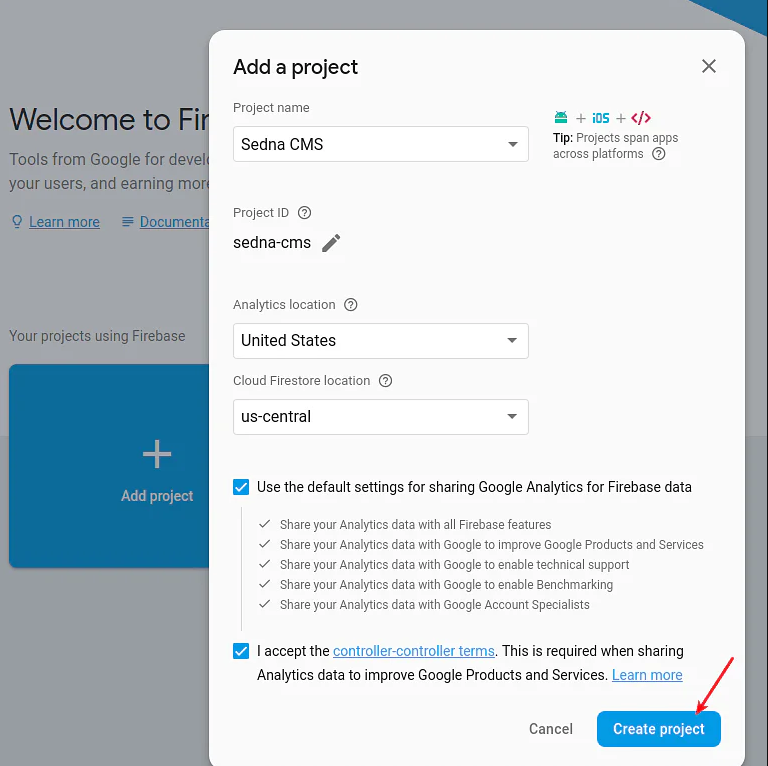
Step 3: After completing the last step, click Create project.
Now, you have a project, you can add your iOS applications to it.
Step 4: Press Add Firebase to your iOS app. Then, follow the steps of setup. If you are importing an existing Google project, this may happen automatically, in which case you can simply download the configuration file.
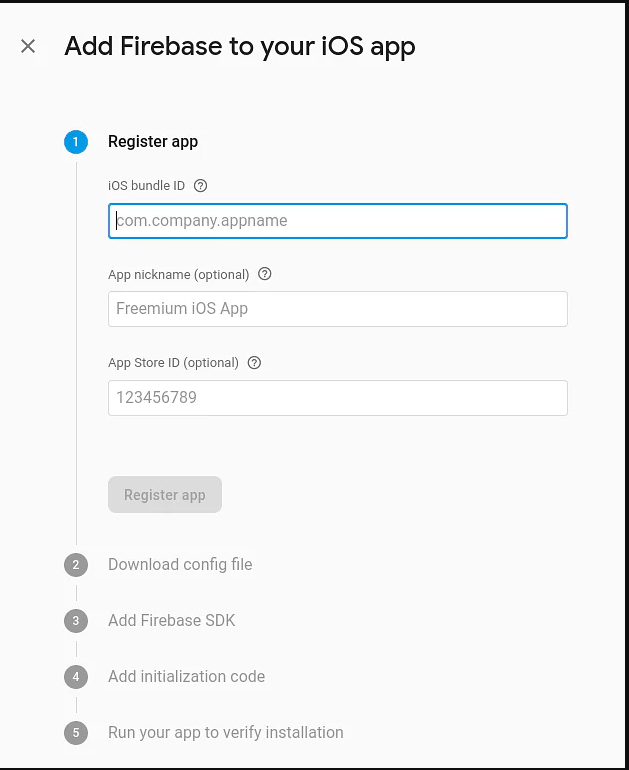
Step 5: Enter the bundle ID for your app when commanded. The bundle ID that your app uses must be entered; this can only be done when you add an app to your Firebase project.
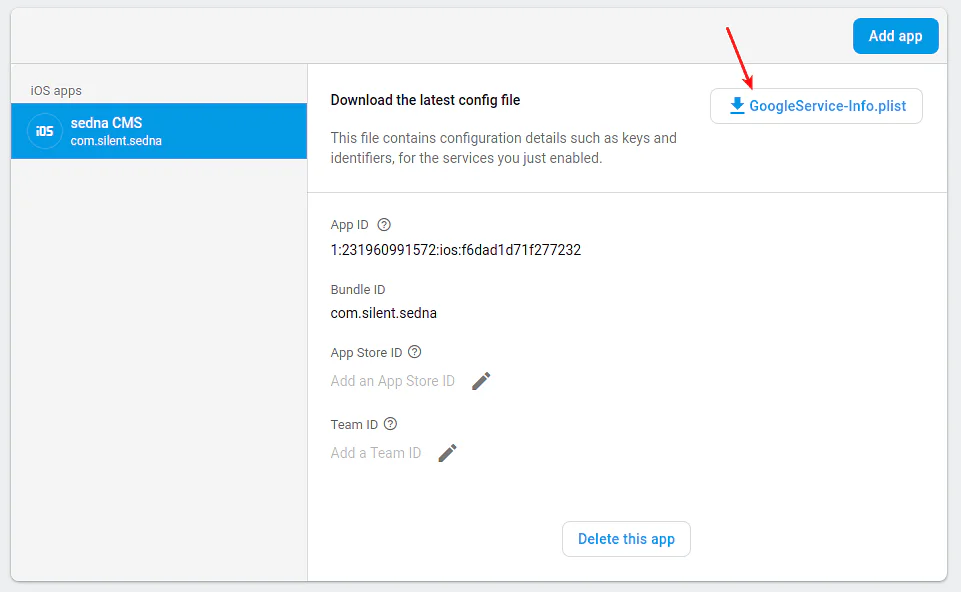
Step 6: You will download a GoogleService-Info.plist file during the procedure. This file is available for future download at any time.
Step 7: Setting GoogleService-Info.plist in the project’s root directory.
Setting up APNs with FCM
Authentication key creation
Step 1: Go to Certificates, Identifiers & Profiles in your developer account and click All under Keys.
Step 2: In the top-right corner, press the Add button (+).
Step 3: For the APNs Auth Key, enter a description.
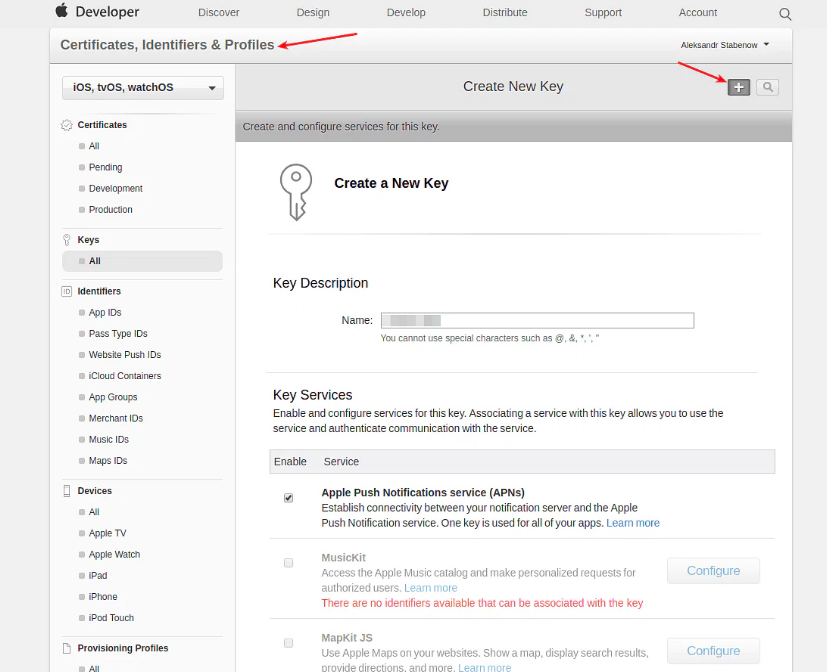
Step 4: Select the APNs checkbox under Key Services, then click Continue.
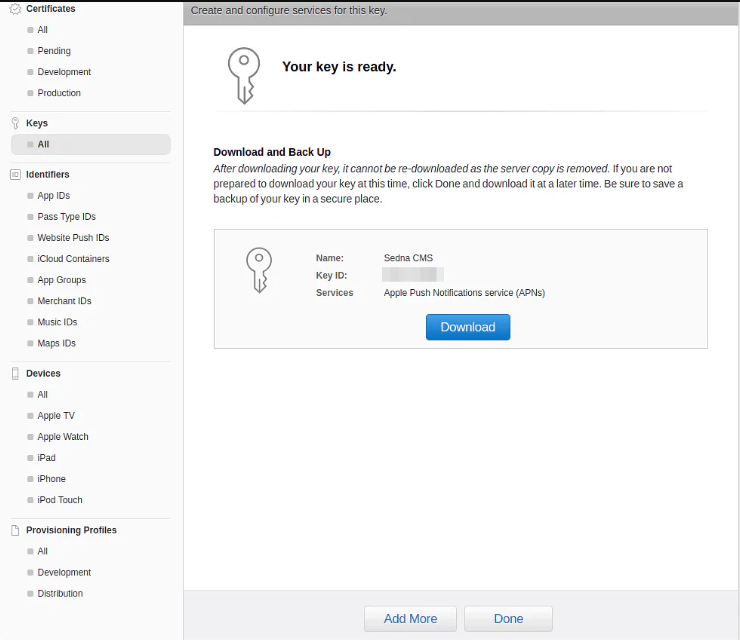
Step 5: After clicking Confirm, click Download. Keep your key in a safe location. The key can only be downloaded once and cannot be
In Firebase, this Upload Auth key iOS APP
Configuration of the iOS app can be found in Firebase Console under Project, Settings, Cloud Messaging
Set an App ID for push notifications
Step 1: You must set up an iOS app’s App ID to send Push Notifications to it.
Step 2: Choose the iOS App ID you want to use from the list, then click Edit.
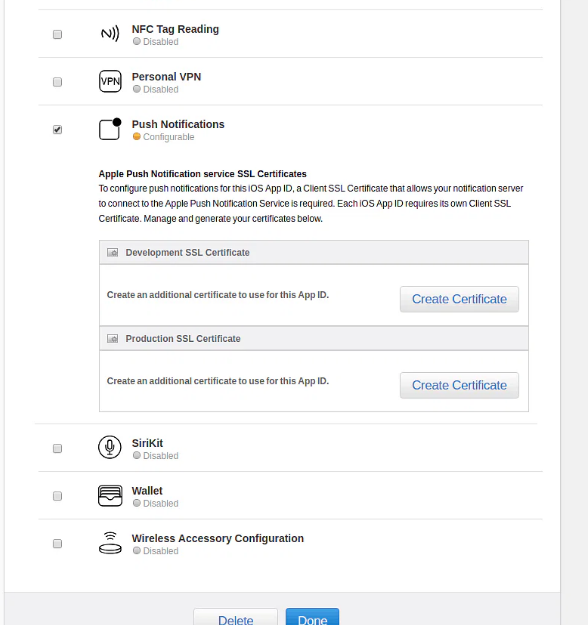
Step 3: You can create a Client SSL certificate for the development or production environment in the Push Notifications section.
Step 4: Click Create Certificate… in the Development SSL Certificate section to create one for development.
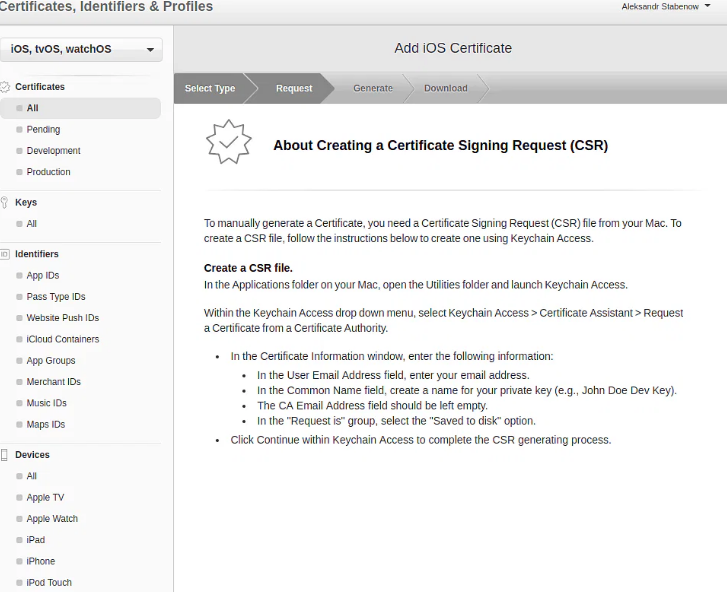
Step 5: The section About Creating a Certificate Signing Request (CSR) with instructions on how to do so should now be visible. Then click Next.
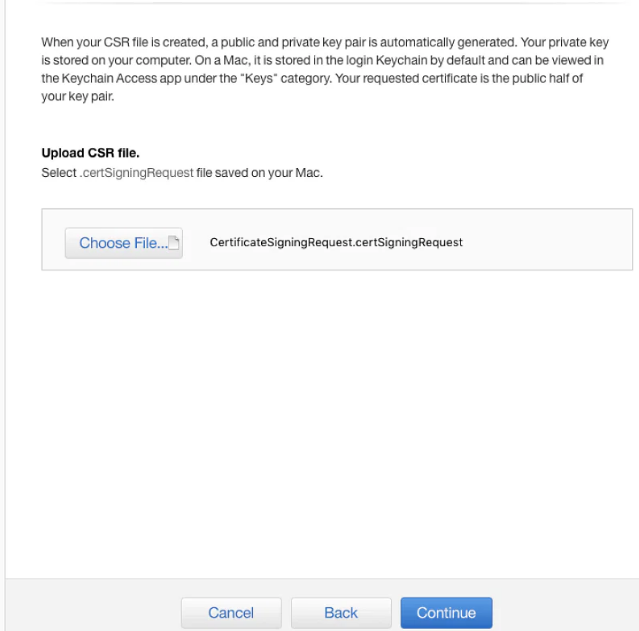
Step 6: The flow should now be in the Generate section. When it becomes active, click Choose File… and select the.certSigningRequest file you previously created, then click Generate.
Step 7: Click Download to save the SSL certificate to your Mac when it’s ready, and then click Done to finish the certificate creation process.
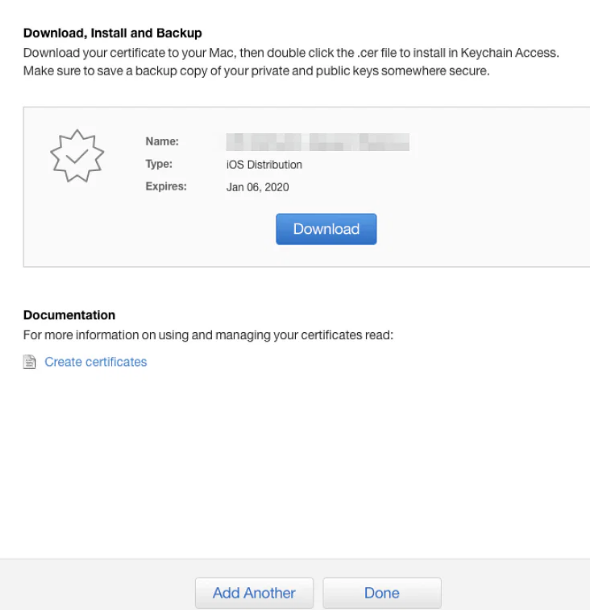
Step 8: Locate the downloaded SSL certificate on your Mac, double-click it, and it will be added to your keychain.
Step 9: Open Keychain Access on your Mac. Locate the certificate you just added; it should be called Apple Development IOS Push Services: your.bundle.id under My Certificates.

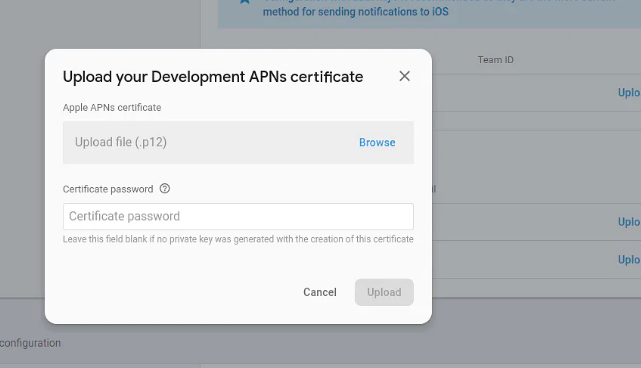
Step 10: Choose Export Apple Development IOS Push Services: your.bundle.id from the context menu when you right-click on the certificate to save it as a.p12 file. If you would like to protect the exported certificate, enter a password.
Wrapping Up
This is how you can set up automated iOS push notifications with FCM. So, set up iOS push notifications for your business and see the magic of push notifications. Moreover, if you want to create push notifications without putting too much effort, then go with Wonderpush as this is the best push notification provider which would help you to create automated push notifications in any environment such as React-native, Android, iOS, and so on instantly.
For more valuable information visit this website